Showing posts with label Mixed Media. Show all posts

Tuesday, 4 February 2020

Vintage Photo Frame

Now this is definitely one I wanted to keep. The beautiful MDF Fob watches are just the right size to put photos in or you could use Tim Holtz images if you haven't any suitable/
I heat embossed the front of the watch frames and then after sticking paper to the back piece, stuck the two pieces together creating the watch.
The MDF tree was also in this release by SamanthaK and the little ladybirds were Sam's stamped images coloured and then 3d using Glossy Accents.

Don't forget you can see all my class samples at www.ladiesthatcraft.blogspot.co.uk

You can buy all of SamanthaK's MDF HERE.

Monday, 23 December 2019

Tick Tock

Was really delighted when I saw this kit from SamanthaK a few months ago. I am a big fan of steam punk and with the clock base in the kit as well there was no choice lol
I didn't put a clock mechanism on this one but it could easily be done.
I made the clock base and stuck on the cogs then painted the whole piece in black gesso.
When dry I rubbed white/gold wax into the whole piece. One of my favourites this year.

Sunday, 17 November 2019

Embrace

I keep forgetting to post pages from my new hardback book journal mainly because I cant stop playing which is the point really I suppose.

So how did this come about? Well i got hooked on a trip to see my friend Mags Woodcock about a month ago. One evening she showed me the book she had been creating in and I loved it so much I decided to start my own.

The book was £1 from a charity shop and was a bit brown and well thumbed. I only use my stash  and no specially bought products so its just a bit more "mine"

This double page started because we were all talking in class about the poppies for Remembrance Sunday and I had a few small circle punches in my craft bag.
 Initially I started with just a few circle flowers
but then I sort of got carried away.
 
This has become my go to book when I want to clear my mind and just play. Hope you like it xx

Monday, 15 July 2019

Another page in my journal

Sometimes its really nice to be able to step away from preparing classes. On Saturday I was lucky enough to attend a Tracy Scott class at The Artistic Stamper in Faversham and I had a great time.
This is my take on Tracy's page and I'm really please with it. 
Different colours for me but that was the point, taking myself out of my comfort zone and learning a few tips along the way. Here is a bit more detail.

The stamps we used are 
PaperArtsy - Rubber stamps - E3 Tracy Scott 28
Had an amazing time and was so pleased with the result. x

Monday, 4 March 2019

Picture for Samantha K Design Team

Made for Samantha K's Design Team in 2018.
If you haven't used Samantha K's MDF yet then you are really missing out. These amazingly intricate Mandalas are a joy to use and take colour beautifully.

And if you want to have a go at making this picture you can find the step by step instructions  HERE. Links to products are HERE

Saturday, 16 February 2019

Poundland Upcycle project 2

Those of you that know me know I love a bargain and Poundland is a favourite haunt of mine when I need inspiration. I came across this Kindle Cover over a year ago and used it in my Art Journal Class (Pictures to follow) so this time I thought I would use die cuts instead of stencils to alter it.

Here is the finished cover
and if you want to have a go yourself here is the link to the VIDEO I made today.

If you enjoy it please subscribe to my YouTube channel. Have a great weekend xx

Sunday, 10 February 2019

Powertex Class

Late last year I was lucky enough to take a Powertex class with Tracey Evans. It was fantastic to be a student for a day and boy did I learn a lot. Here is the Unicorn that I made. It is sitting on my sideboard at home and is about as tall as an A4 picture frame.
I still can't believe I made it and I am forever grateful to Tracey for her time, patience, creativity and for sharing her vast knowledge.
 
I loved stamping into the clay and the process of painting and highlighting the mane.
I made a flower saddle to finish it off.
Can't bare to put him into the garden so he will stay in the house taking pride of place. Thank you Tracey for an amazing day. Off to finish my second piece so watch this space. xx

Friday, 25 January 2019

Love what makes you happy ....

A simple Art Journal was the perfect book to show off the beautiful Aladine IZink 3D Texture Paste.
A simple stencil provided both the main image and the wording and you can see how I made it HERE. Thanks for stopping by xx

Tuesday, 22 January 2019

3D Photo Frame

I have so many DT things to share that I don't know where to start. This one is one of my favourites made for SamanthaK's Design Team not only because it took me ages to make but I really liked the way the paper figures fitted into it.
This is one of the shelf unit supplies by SamanthaK. They are sturdy and go together really quickly and are ideal for little bottles or indeed as a frame.
I use a lot of Tim Holt's diecut figures in my art journal but I have started printing my own family photos onto 200gsm card and cutting them out for a more personal touch. 
If you make something like this it is a good idea to have a selection of characters sitting, standing, crawling, jumping so that they fit into the background. More tomorrow xxx

Sunday, 21 October 2018

Poundland Frame Upcycle

Yes I visit Poundland on a regular basis mainly because they have cheap objects which I can use for my Mixed Media projects. I have been doing this for a while now and suddenly thought I should share the process so that you could do the same.

This picture shows the finished frame I made from a white plastic £1 frame. It is so easy to do and gives you endless possibilities.
You can watch my video below to see the process. I haven't speeded it up to much so it is easier to see what I am doing. If you like this and want to be notified when my next Poundland Upcycle video is released then please subscribe to my YouTube Channel.

Sunday, 14 October 2018

Imagine

so as most of you know I have been on holiday soaking up the sun. Normally when this happens I miss out on a DT kit but this time Samantha Kingdon kindly sent me a kit anyway and so I thought I'd do a how to video to show how wonderful her products are and how to use them.

This time I chose the snowflake frame and the snowflakes to make this layout/canvas
Here is a bit of detail but if you scroll to the bottom you will find my how to video and links to Sam's shop and facebook page.


loving that crackle. If you have any questions please post them in the comments and if you watch this in Youtube please subscribe to my little channel. NO music added as I know sometimes it can be annoying but feel free to hum along while you watch. Enjoy xx

Sams Website  HERE
Facebook page  HERE
You can buy the papers in my new shop :  The Kit Cafe

Sunday, 30 September 2018

Alchemy

I am back from my holidays hence the break in blogging so I had better get cracking. So much to do and so little time.
This was the third project I made for SamanthaK. I was so chuffed that this release came with bottles, labels and science pieces as I had this picture of my granddaughter that I was desperate to use.
The wonderful thing about good quality mdf is that it takes most mediums without using any base coat like gesso. For this layout I used Matt acrylic paints. The background paper is beautiful and only needed a few lines and detail added with a white pen.
It never ceases to amaze me how intricate the wording is. So pretty.
and the periodic table elements carved into the little tiles was genius as they are just fine enough to take a different colour to the tile itself.
I made one more layout with this kit which I will share tomorrow and don't forget, you can buy all of SamanthaK amazing products HERE

Sunday, 26 August 2018

Secret Box

Oh this is so very clever. A lockable box for secrets and surprises. 
I have used the mdf bottles wording labels and the locking box for my project.
and added some of the Tim Holtz people inside however this could be easily used to hide a secret journal away from prying eyes lol.
I did use texture around the spine of the book just to show that it is possible and that the book still bends. All I would say is keep checking as the texture drys.
I used texture paste and a needle to scrape the edges of the book to make it look like book pages. I think decorating these book boxes is going to become a passion lol.

You can find Samantha's MDF and other items HERE and of course on the SamanthaK site. 
These boxes were a sell out on the show but they will be available again in Sams shop so I'll keep you posted. More to come xx

Wednesday, 22 August 2018

So excited

I am starting a new chapter and it is so exciting. I have been asked to join SamanthaK Design Team allowing me to get back to scrapbooking. I was sad to leave Pretty Gets Gritty as they are a great bunch of talented ladies but it was time for a change. So.....

SamanthaK's show is on Hochanda TV on Saturday at 3pm. There are loads of new goodies which I know will just fly off the shelves. I am going to share each of my projects in the lead up to the launch.

My first project is a herb box
Made from the small box but using the grill piece on top to hold the tags in place.
The little herbs and wording are all MDF and available in the show.
and I used large beads as feet for the box painted to match the colours used for the herbs.
I really enjoyed making this and it looks so pretty. I am going to have to make another one for myself. 

You can find Samantha's MDF and other items HERE and of course on the SamanthaK site. (To find the products on the show on Saturday go to the schedule and look for Sat at 3pm and the new items will appear there soon) More tomorrow xx

Thursday, 26 July 2018

Through the porthole

I love paying with cardboard. It has so many uses and was ideal to show off Lynette Jasper's Sprays. Here is the first project I made for the Pretty Gets Gritty Shows on Hochanda TV Friday 27th July at 10am and 3pm.
This took quite a bit of work but I love the way it looks like the inside of a rusty shipwrecks porthole showing the blue sea and its underwater sea life outside.
The bolts around the porthole are chipboard discs and a flatback bead on top.
The rivets are also flat backed pearls
And the lovely fish, crab and Starfish are all on the show.

The process I followed was this:
I used the back of my canvas as a base. I cut pieces of old corrugated cardboard and fitted it around the canvas and the MDF wreath shape I used as my port hole.
When I was happy with the look I stuck all of the cardboard in place but not the wreath.
Once dry I peeled off some of the cardboard to show the corrugated texture.
Next I added pearl as rivets along the joins in the cardboard. Once dry I started to Build my colours by painting the whole thing (and the wreath) in black gesso.Once dry it started spraying the background with Lynette's sprays, starting with the chalk sprays and allowing it to dry between each colour.
I followed the same process with the wreath/porthole but before I sprayed I used some of the marble effect texture paste to make the rust marks around the edges. Next I sprayed to match the background.
For the sea I scrunched up some kids drawing paper and then flattened it out. I then used the new chalk sprays and powders to create the background. I allowed this to dry naturally so that I got maximum lines and puddle marks.
I placed the paper under the porthole and stuck both in place on the background making sure that i created a small dip in the sea piece for the sea creatures.
Lastly I painted and stuck the sea life in the post hole and allowed to dry thoroughly.
The canvas looks very different in different lights. You saw the finished piece at the top of the page. Here is another photo taken outside.
If you have any questions please comment below and make sure you watch Lynette Jasper. The design team have all been busy making wonderful inspiration for you.
#prettygetsgritty #lynettejasper #hochandatv #craftbuddy #mixedmedia #newnanny

Thursday, 19 July 2018

It's just a bottle

As my love of mixed media has grown I have found myself squirrelling away all manner of bottles and jars. I just can't bear to throw them out and as if that wasn't enough I have actually been buying empty bottles from Poundland and adding those to me collection too.
Here is photo progress of one of these bottles and its transformation into a usable water bottle for the table.
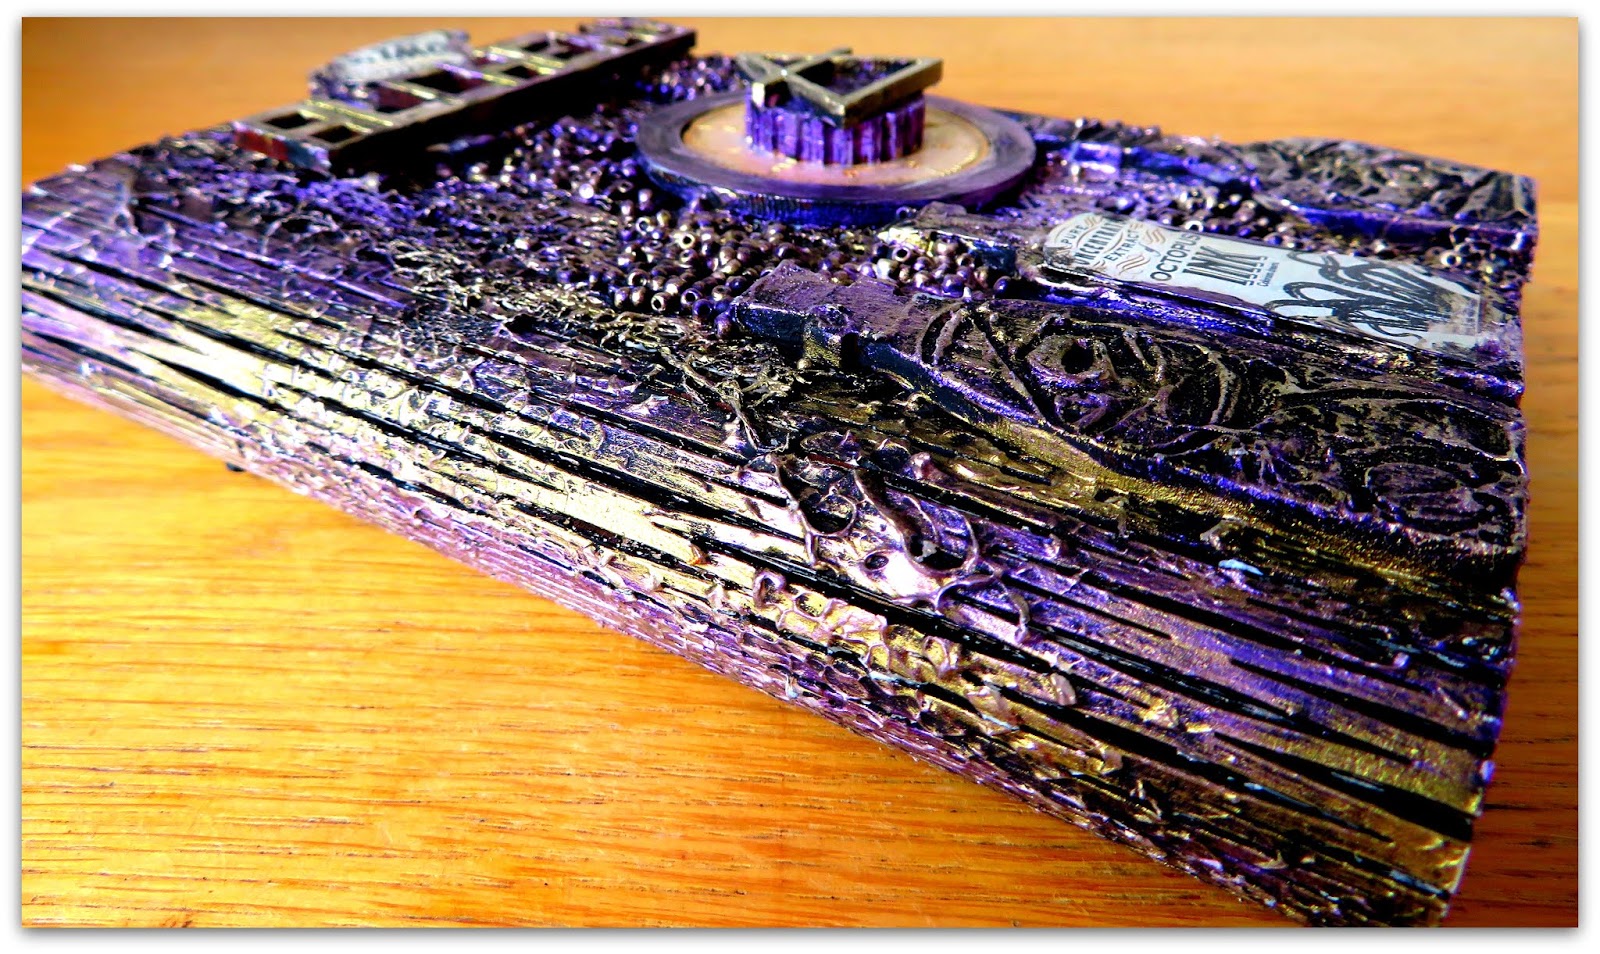
So to start I painted the bottle with white gesso. I used Prima's Heavy Gesso as it covers really well. Next I added all manner of stones, sequins, beads, etc to the surface using 3D Matte Medium. I then left it overnight to dry thoroughly. 
Next I went over everything twice with the Heavy White Gesso and allowed to dry thoroughly. 
To finish I sprayed the bottle using three different sprays in blue, green and white. When dry I then dripped some more colour onto the top of the bottle and sprayed with water to allow it to run easily through the embellishments. 
Doing something like this is easy and cheap to do. You can use ANYTHING like small stones from the garden, buttons, shells from the beach, the possibilities are endless.x