Here are a few pages of my Christmas book which was made for a class in 2008.
I used the Acrylic as my front cover to protect the book. I stamped on either side of the acrylic with a Penny Black stamp using a glue pad and then gold glitter pushed into the glue. The trick to getting this to work is to be patient. Leave your work to dry for 24 hours. When this is done you can brush away the excess glitter.


The snow is made from Liquid Pearls and then when dry, I have added Frosted Lace Stickles. Make sure you give both plenty of time to dry. 

The tree was glittered and then attached to the page with silicone so that is raised. 

The trees were cut from the triangle paper in the kit. Notice that some of the trees are raised to give the page depth. The border separating the the page is from a sticker sheet. 


Because this was made for a Christmas yet to take place, I wanted to make sure that I got everyone to take part in the completing of the book. I added extra pages throughout the book, their size depending on the size of my photos, and on the back of each I have included some questions for each person to complete. This means I have information about Christmas 2008 for my book and examples of everyone's handwriting.
I will use rub ons to decorate the photos. 


This was one of my favourite pages. I did show everyone how to make the pop up snowman in the class. Not sure I can still remember how to do it now.

This is the reverse of the bauble page. I kept the decoration to a minimum by just adding punched holly around the edge as I intend to add journaling after Christmas. 
This page was separated with a sticker border and is the plainest of the pages but left deliberately for photos or journaling after Christmas. 


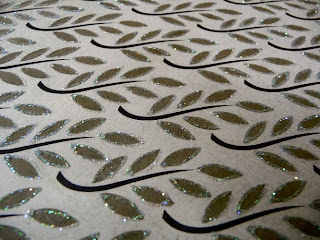
As you can see there are 3 photo inserts before the leaf page. All of the leaves on the page have been individually glittered using a Quickie Glue Pen and Glamour dust. 
This is the plainest of the pages with just a sticky border across the middle. Photos and journaling will be added after Christmas.

The pages were embellished using the 2 holly leaves on the sticker sheet as a pattern. Note the circle on the side of the book. 

The circle is a mechanism for producing the pop up bear. Those of you who chose to add this to their book were shown how in class. 

The owl is by Hero Arts and was provided in the kit. The cage is made from the window template. I removed the windows and then cut small strips of paper and glued then to the window. Once dry I coloured with gold paint dabber and then put on a thick coat of Glossy Accents on the cage giving it depth. The owl was coloured in using ultra fine glitter and was attached to the cage by his feet. The cage is attached to the page only by one gold brad to give movement.
This book has photos of each of the family members who will be there at Christmas. By building your book this way, you can add as many photos and extra pages as you want. 
The final page is decorated only with red glitter on the berries and is being saved for a family picture. 
And lastly the back page.
Looking back on past projects is always fun. I am going to sit and work out how the mechanisms worked. I might use them again this year.xx
No comments:
Post a Comment